Follow Me On My New Blog – Healthy Home Cafe

Dear All

Thank you so much for following this blog, trying out my recipes and letting me know how they turned out

I have now decided to go a different way with my blogging and have set up a new blog that incorporates meals as well as snacks, so will no longer be adding new content to this blog

Please check out my new blog at Healthy Home Café

Thank you

Caroline

Leave a comment

Filed under Uncategorized

Muffin Tops

Image

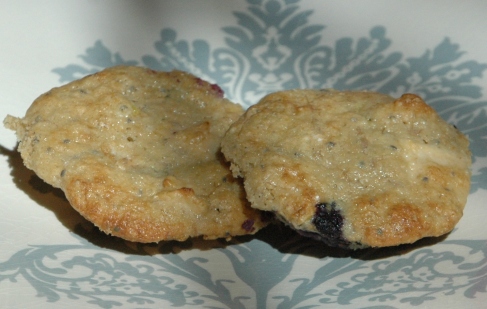
Recently I saw some new baking trays to make muffin tops!  Being a Seinfeld fan, I chuckled as I reminded myself of the muffin top episode.  So this morning I was making muffins and thought it may be fun to bake them in a shallow tray to just make muffin ‘tops’!  To cut a long story short, I used my old patty pan tins (which reminded me of how portion sizes of food have increased dramatically!) and they turned out quite well.  I have to agree with Elaine (from Seinfeld) that the top of the muffin really is the best part! Enjoy 🙂

Blueberry Banana and Apple Muffin ‘Tops’

Makes 36 ‘tops’

3/4 cup wholemeal self raising flour

3/4 cup white self raising flour

2/3 cup brown sugar (you may be able to use a bit less as they were quite sweet)

1 tablespoon chia seeds

1 large green apple, finely diced

2/3 cup frozen blueberries

2 eggs

1/4 cup low fat Greek yoghurt (I use Black Swan available in Woolworths)

1/3 cup low fat milk (I used soy)

2 tablespoons extra virgin olive oil

1 over-ripe banana

You will need at least one 12-hole patty pan tin that you will need to grease with a little oil (and use 3 times!)

Preheat oven to 175 degrees

In a large bowl, sift together the flours, then add sugar, chia seeds, blueberries and apple.  Stir to mix well and coat the blueberries (this is supposed to stop them from sinking to the bottom of the muffins)

In a smaller bowl, whisk the eggs, then add yoghurt, milk and oil.  Whisk until well combined.  Add banana and mash with a fork before ‘mixing’ it in (it will be lumpy which is fine)

Pour wet ingredients into the dry ingredients bowl and mix until JUST combined.  Remember with muffins not to over-mix or they become tough!

Plop mixture into prepared tins and bake for around 12 minutes, until they feel firm when you press them lightly

Leave for a few minutes before popping them out and eating at least a few while they are still warm! Mmmmm!

Leave a comment

Filed under Uncategorized

Tahini Balls

I love tahini.  First of all it tastes delicious, but it is also very versatile.

Well known as one of the ingredients in hommus, it can be used in both sweet and savoury dishes, added to sauces and dressings or simply spread on toast (and topped with slices of fresh tomato) for a quick and nutritious breakfast.  Mostly used in Middle Eastern cooking, it is also popular with vegetarians and vegans due to its high nutrient content, which includes iron and calcium as well as Vitamin B1, magnesium, zinc, selenium and fibre.

Tahini is sesame seeds that have been ground into a paste.  I say it is like peanut butter that is made from sesame seeds and find most people who like peanut butter will like tahini or perhaps even prefer it!

My mum first introduced me to the recipe for these balls.  I think she heard it on the radio.  It is from a well known fellow dietitian Karen Inge who originally got the recipe from Gwinganna Lifestyle Retreat.  I made a few changes to the original recipe according to what I had on hand and they are so delicious.

These tahini balls are quick to make, no heating or cooking is required and you only need one bowl to mix them in, which means not much mess to clean up after making them!  That’s definitely a plus!!  Enjoy 🙂

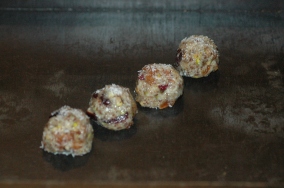
Tahini Balls

  • ½ cup tahini (I used hulled tahini)
  • 1/3 cup honey (original recipe had 1/2 cup which I found was too sticky)
  • ½ cup desiccated coconut
  • ½ cup LSA (a combination of linseed (called flaxseeds in America) sunflower seed and almond which is made into a ground meal; I used just sunflower seeds and linseeds, 1/4 cup of each which I ground in my thermomix)
  • 1 cup Australian dried apricots, cut into pieces (I used mostly dried apricots with a small amount of dried cranberries)
  • ½ cup chopped almonds (I used pistachios)

Mix all ingredients together to make a stiff mixture. Use more coconut if necessary. Mix into small balls and coat with coconut.

Makes 30 x 20g balls

Each ball has 337kJ or 80 calories

2g protein, 6g carbohydrate, 5g fat (0.7g sat fat), 2g fibre

and are very delicious!!

2 Comments

Filed under Balls, Gluten Free, No Cooking Required

Brownies with a difference

What a great way to increase your fibre intake….

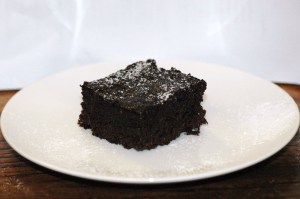
These brownies are delicious, you would not know that they have chickpeas in them!

The addition of chickpeas allows the amount of fat you would normally add to brownies to be greatly reduced and of course the fibre greatly increased.

I was a bit doubtful myself as to what they would turn out like, but I will definitely be making them again…enjoy!

Hi Fibre Brownies

Makes 16 brownies

Ingredients

  • 1 tbsp linseeds
  • 1 cup cooked chickpeas, drained and rinsed
  • 1 1/2 tsp vanilla essence
  • 1/2 cup canola oil
  • 4  eggs
  • 3/4 cup wholemeal self raising flour
  • 1 1/4 cups sugar
  • 1/2 cup dark cocoa powder

Directions

Preheat oven to 170ºC

Line a 8″ x 8″ cake tin with baking paper.

In a blender, process linseeds to a fine powder.  Add chickpeas and process until smooth.  Add vanilla, oil
and eggs.  Blend for 10-20 seconds to a smooth consistency.

In a mixing bowl, combine sifted flour, sugar and cocoa.

Add combined bean mixture to dry ingredients, mix well.

Pour batter into baking dish.

Bake for 30-35  minutes, or until brownies are cooked through and knife inserted in the centre comes out clean.

Each (60g) brownie has 816kJ or 194 calories, 1 g of saturated fat and 2g of fibre

Leave a comment

Filed under Chocolate, Slices

Sour Cherry & Ricotta Strudel

We are lucky enough to live around the corner from Paesanella, which is just the most delicious cheese shop.  One of my favourites from there is their fresh ricotta – I can’t tell you how scrumptious it is.  You can buy it in 1kg lots, but I prefer the 2kg tub as it makes me think of new and interesting ways of using it up.  Of course, one of my ultimate favourites is just spreading it, straight from the tub, on fresh sourdough bread, perhaps adding a few slices of fresh tomato and some freshly cracked black pepper….delish and very YUM!!

So the other night I had some ricotta in the fridge, also a packet of opened filo pastry and some morello cherries in the pantry.  I started to think that that sounded like a good combination and strudel came to mind.  I googled to get an idea of some similar recipes but couldn’t find anything that grabbed my attention, rather just some ideas for quantities and how not to do the strudel!

So I improvised, and this is what I came up with….

Sour cherry and ricotta strudel

Serves 8

  • 250g ricotta
  • 1 large egg
  • 50g honey
  • ½ teaspoon ground cinnamon
  • 6 sheets filo pastry
  • 20g melted butter or oil
  • 1 tablespoon breadcrumbs
  • 2/3 of a 670g bottle of morello cherries, drained

Preheat oven to 200 degrees.  Line a baking tray with greaseproof paper

Mix together ricotta, egg, honey and cinnamon until mixture is smooth

Lay out 2 sheets of filo pastry on top of each other with the long end facing you. Brush with a little of the melted butter or oil and sprinkle with ½ tablespoon of breadcrumbs.  Place another 2 sheets on top and repeat with butter/oil and breadcrumbs.  Place the remaining two sheets on top.

Cover half of the filo pastry closest to you with the ricotta mix, leaving about 2 cm free on the sides.  Cover the top of the ricotta with the morello cherries. Starting from the long side facing you, fold the pastry over the ricotta, tucking the ends in slightly and then proceed to roll the strudel up. 

When fully rolled, transfer the strudel to the baking tray and bake in the hot oven for 18-20 minutes until golden brown.

Serve warm, preferably

Note: instead of using cinnamon, next time I may try a little lemon or orange zest mixed in with the ricotta 🙂

Per serve 148 calories/620kJ

or using low fat ricotta 141 calories/592 kJ

Leave a comment

Filed under Tarts, Uncategorized

Peanut Butter Coconut and Oat Biscuits

These are really yummy

 A delicious crunchy biscuit that is great to eat any time of the day

 Easy and quick to make, just don’t spoil your dinner by eating too many!!


Enjoy 🙂

Peanut Butter Coconut and Oat Biscuits

Makes 32 biscuits

  • 1/4 cup canola or olive oil
  • 1/4 cup peanut butter
  • 1 tablespoon castor sugar
  • 1/4 cup brown sugar
  • 1 egg
  • 1 tsp vanilla
  • 1/4 cup desiccated coconut
  • 1 ½ cups whole rolled oats
  • 1/2 cup unbleached plain flour
  • 1 tablespoon unprocessed wheat or oat bran

Preheat oven to 170 degrees. 

Line 2 baking trays with greaseproof paper 

Using a wooden spoon, mix together oil and peanut butter then add egg, sugars and vanilla and mix until well combined.

Add coconut, oats, sifted flour and bran all in one go and mix until just combined, do not over mix. 

Using 2 teaspoons, drop heaped teaspoonsful onto a baking tray. Gently press to flatten completely with slightly damp fingers and bake for 12-14 minutes or until lightly browned. 

Each delicious biscuit has 280kJ/67 calories

3g fat, 0.7 saturated fat

6g carbohydrate, 1g fibre

1 Comment

Filed under Biscuits

Lemon Blueberry and Polenta Cakes

This morning I bought a new cake tin and was bursting to use it.  It’s a mini bundt cake pan (how cute!)

These lemon cakes were the first idea I came up with to use my new pan for 2 reasons –  1. we have a pile of lemons to use and 2. I saw this recipe only last week on  Cooking Light which really took my fancy! (Mind you I didn’t make the exact recipe, I played around with it just a little – first I only did 1/2 the quantity, I used wholemeal self raising flour, I cut the sugar down to 1/3 rather than 1/2 cup (all American recipes are too sweet) and of course added some frozen blueberries (YUM!))

One of the things I love about low fat cakes is the simple muffin style way of making them.  Two bowls are needed, one for wet and one for dry ingredients.  The fat most often used is liquid, either oil or melted butter.  Once the wet and dry ingredients have been mixed together separately, the two are combined and gently folded together until only just mixed through.  Over-mixing can develop the gluten in the flour (that’s why you knead dough) which will develop a tough, rough textured muffin or cake in this case!

Although that sounds long and complicated, this type of cake is actually really quick and easy to make.  Much faster than a traditional beat butter and sugar, add eggs one at a time, blah blah…. full fat cake, and a lot less mess (well, in my kitchen there is!)

These cakes apart from looking really cute are rather delicious, especially with the polenta which gives them that slight textured crunch which I really like.  I fancied putting a glaze on them to get that lovely drizzled effect running down the bumpy edges, however they don’t need it and are just as delicous naked 🙂

In summer a few fresh blueberries could be added to the centre hole and on the top to really lift presentation.  I tried with a few de-frosted frozen blueberries but they looked a little deflated!

These little cakes could even do as a really light, portion controlled dessert – at only around 130 calories each, I think that is a pretty light dessert option.  Enjoy 🙂

Lemon and blueberry polenta cakes

  • 2/3 cup (100g) wholemeal self raising flour
  • 1/4 cup cornmeal/ polenta
  • 1/3 cup  sugar
  • 1/3 cup frozen blueberries
  • Zest of 1 lemon
  • 1  large egg
  • 1/3  cup  low fat buttermilk (I used ½ low fat milk, ½ low fat natural yoghurt)
  • 30ml (1 ½ tablespoons) olive oil

Preheat oven to 170 degrees.  Spray or brush 8 holes of a 12 hole mini bundt tin with a small amount of oil (alternately use a regular muffin pan, but they will take a little longer to cook)

Combine sifted flour, polenta, sugar, blueberries and lemon zest in a medium sized bowl, mix well to combine ingredients and coat blueberries with flour. Make a well in centre of mixture.

In a smaller bowl, whisk egg, then add buttermilk and oil, whisking well. Add buttermilk mixture to flour mixture, stirring gently until completely combined. Carefully spoon batter into the 8 prepared pans and smooth top. Bake at 170° for 12-14 minutes or until firm to touch. 

Allow to cool in tin for 2-3 minutes before loosening each cake gently around edges with your fingers, then flip tray onto a cooling rack allowing the cakes to pop out of the tin.  Allow to cool almost completely before drizzling with the glaze mixture, or enjoy just as they are!

Optional Icing glaze

  • 2 tablespoons icing sugar
  • 3-4 teaspoons lemon juice

Mix together to desired consistency.  Using a teaspoon, drizzle over cooled cakes

Makes 8 cakes @ 52g each

543kJ/129 calories

4g fat, 0.7g saturated fat

18g carbohydrate, 1.8g fibre

With icing glaze

589kJ/140 calories each

Leave a comment

Filed under Cakes, Cupcakes, Muffins

My 4 ingredient Quick & Easy Creamy Pumpkin Soup

As much as I love to cook, and cook from scratch, I do appreciate a good tasty recipe with not too many ingredients and no fussing about!  A recipe where for only a few minutes of chopping and blending a good amount of delicious food is produced.  This pumpkin soup is a staple recipe of mine that I make often as it fits in this category – it is soooo incredibly quick and easy and it is very yummy.

Pumpkins are one of my favorite vegetables when cooking as they go in virtually anything, sweet or savoury – muffins, cupcakes, casseroles, curries….and who doesn’t like pumpkin soup!  I love butternut pumpkin as the flesh is not too hard so it is easy to cut and most of the time you don’t need to take the skin off which saves time and adds extra fibre (doesn’t a dietitian love that!).  Pumpkins are in season right now which is why the price has come right down.  My butternut pumpkin (weighing nearly 2kg) cost only a little over $1 which makes for a very cheap soup 🙂

This would be a great snack for kids after school at this time of year as not only will it help to warm them up, it is a great way of getting extra vegetable serves into them!  Of course a larger serve makes a great lunch with some wholegrain or sourdough toast topped with a lean protein like chicken, tuna, salmon or low fat cheese.  This is what we had for lunch today and it was delicious.  Enjoy 🙂

Creamy Pumpkin Soup

Makes 10 snack sized servings (320g per serve = 1 1/3 cups approx)

  • 1.75kg butternut pumpkin (= 1.6kg pumpkin after discarding seeds etc)
  • 2 medium sized brown onions
  • 1.2 litres stock or water + 1 heaped Tablespoon Massel stock powder (vegetable or chicken)
  • 1 cup evaporated milk – the light and creamy one

Cut pumpkin in half just above the bottom bulb shaped bit

Cut off the hard top bit that was attached to the plant, then without taking the skin off, roughly chop this section of the pumpkin.  The smaller you cut it will cut down on the cooking time.

Cut the very bottom off the bottom bit that has the seeds in it, then chop it in half lengthways, then in half again (so it is now in quarters).  Using a spoon you can now easily scoop the seeds out.  Again without skinning it, chop all four sections roughly.  Add all of the pumpkin to a reasonable sized pot = one that can easily hold approx 3 1/2 litres of soup.

Chop top and bottom off onions and cut into quarters.  This is the easiest way to peel them.  Place peeled onions in pot.

Add stock or water and stock powder to the pot, place lid on pot and over a high heat bring to the boil.  Once at boil, turn heat down to a simmer and with the lid still on, continue to cook for 15-30 minutes depending on size of pumpkin (larger sized pumpkin pieces will require longer cooking)

Blend either in food processor or with hand blender.  When smooth, add evaporated milk and stir thorough.  Taste and add a little salt or pepper according to your requirements.  Some fresh chopped herbs like parsley or coriander can also be sprinkled on top.

   Per serving  –  103 Calories    6g Protein   

1g Fat   0.8g Saturated Fat    16g Carbohydrate   3g Fibre   

120mg Calcium (that’s more than 10% of the daily requirements for most of us!)

Leave a comment

Filed under Soups, Uncategorized

Spelt Carrot Muffins

After trying to find snacks for my clients following a low FODMAP diet and not coming up with much, I decided to create a low FODMAP muffin.  The low FODMAP diet is essentially an elimination diet which is useful for reducing symptoms of irritable bowel syndrome such as abdominal bloating, excessive wind, abdominal pain and changes in bowel habits (ie. constipation or diarrhoea).  I see a lot of people with varying degrees of these symptoms which apart from being uncomfortable and annoying, can often be life-limiting.

Many foods we commonly eat contain FODMAPs so it can be quite difficult to access foods for this diet, especially if you stay on it for some time as boredom may set in!

There are a few considerations when making low FODMAP muffins – you can’t use wheat flour, many fruit like apples or pears, dried fruit, honey or large amounts of milk or yoghurt.  All of these ingredients are usually featured in my normal muffin recipes.

Spelt flour is low FODMAP and can be used instead of regular wheat flour (which is high FODMAP).  Spelt is an ‘ancient’ variety of wheat, so it still contains gluten and is often tolerated by those who think they may be gluten-sensitive.   You can find spelt flour on the supermarket shelf now it is that popular!  It comes in white or wholemeal like regular flour, however you will need to add your own baking powder for a self raising form.  I used an organic wholemeal Australian produced spelt flour (which is the preferred choice for the diet).  Instead of raisins or sultanas I used a combination of walnuts with sunflower and pumpkin seeds for extra crunch and carrots are low FODMAP.  All up I think I produced a pretty good muffin.  For those of you with IBS, hopefully you can enjoy pain-free! 🙂

Spelt Carrot Muffins   –  Low FODMAP

  • 1 ½ cups wholemeal spelt flour
  • 1 ½ teaspoons baking powder
  • 1 teaspoon cinnamon
  • ¼ cup brown sugar
  • ¼ cup walnuts, roughly chopped
  • 1 Tablespoon sunflower seeds
  • 1 Tablespoon pumpkin seeds
  • 2 carrots (150g), grated
  • 2 eggs
  • 3 Tablespoons oil
  • 1 teaspoon vanilla essence
  • ¼ cup lactose-free milk
  • ¼ cup low fat natural yoghurt

Preheat oven to 180 degrees and line 14 muffin-tray holes with paper cases.

Sift together flour, baking powder and cinnamon.  Stir in nuts, seeds and carrot.

In a separate bowl, whisk the eggs.  Add oil, vanilla, milk and yoghurt and whisk until well combined.

Pour wet ingredients into dry ingredients bowl and mix until just combined. 

Spoon into muffin trays.  Bake for 15 minutes, approx or until they are firm to touch (spring back)

Delicious while still warm!

Makes 14 Serves

Per Serving (42g  Muffin)  –   Calories 130      Protein 4g    Fat 7g   Sat fat 1g   Carbohydrate 12g    Fibre 2g

Leave a comment

Filed under Muffins

Fig Date and Walnut Loaf

Last night while we were at the roller derby (yes, roller derby! which actually was fun) a friend of ours asked if I had any suitable cake recipes for someone with Type 2 diabetes and high cholesterol and I immediately thought of this one.

The requirements for someone with both conditions is to choose food that is low GI, low in saturated fat and high in soluble fibre.  This cake is all of those things – low GI, low in saturated fat and a good source of soluble fibre.  The other thing to consider of course is the serving size.  Keeping to around 15g of carbohydrate for a snack serve is a good guide (which is roughly equivalent to a medium sized piece of fruit)

This is a high fibre chewy style of cake that is rather delicious straight out of the oven and can be spread with low fat cream cheese or ricotta for a few extra calories.  It is very filling and keeps suprisingly well, but I can only guarantee 4 days as in my house it is all gone by then!

Enjoy 🙂

Fig Date and Walnut Loaf or Muffins

Makes 18 muffins or 1 loaf cut into 18 slices

  • ½ cup dried figs, chopped
  • ½ cup dried dates, chopped
  • 1/4 cup brown sugar
  • 50g margarine (or butter if you don’t have high cholesterol)
  • 125ml water
  • 1 teaspoon bicarb soda
  • ½ cup wholemeal plain flour
  • 1 cup wholemeal self raising flour
  • 1 teaspoon ground ginger
  • 1 teaspoon ground cinnamon
  • 1/3 cup chopped walnuts
  • 1 small banana, over-ripe and mashed
  • 1 large egg, lightly beaten
  • 1 teaspoon vanilla

Place figs, dates, sugar, butter or margarine and water in a small saucepan and cook for 3 minutes.  Remove from stove, add soda, stir through well, then allow to cool.

 Meanwhile, pre-heat oven to 160 degrees and grease and line the base of a loaf tin or paper line muffin trays.

 Sift together flours, ginger and cinnamon.  Add walnuts.  Mix together banana, egg and vanilla.  Add to date mixture, then fold in dry ingredients.

Spoon mixture into loaf tin or muffin tins and bake for 40 minutes/15 minutes approximately, until a skewer poked into the centre comes out clean.  Remove from tins and cool on wire rack

Per serve

122 calories

17g carbohydrate (approx 1 carbohydrate serve/exchange)

0.6g saturated fat

3g fibre

Leave a comment

Filed under Cakes, Muffins